WiFi Trilateration
What is Trilateration?
Trilateration is the process of determining the physical location of the source of a radio frequency signal using the recorded signal strength. Nzyme can automatically perform trilateration if you have at least three taps placed on the same floor of a building.
How to use Trilateration
The trilateration functionality will work mostly automatically, after some preconditions are met:
- You have to have at least three taps, placed on the same floor of a building and all those taps have to have recorded at least one frame of the analyzed signal source.
- If you are a organization administrator or tenant user, you have to have access to those taps.
- The taps do not have to be selected manually using the tap selector. Nzyme will always use all taps on a floor that the user has access to.
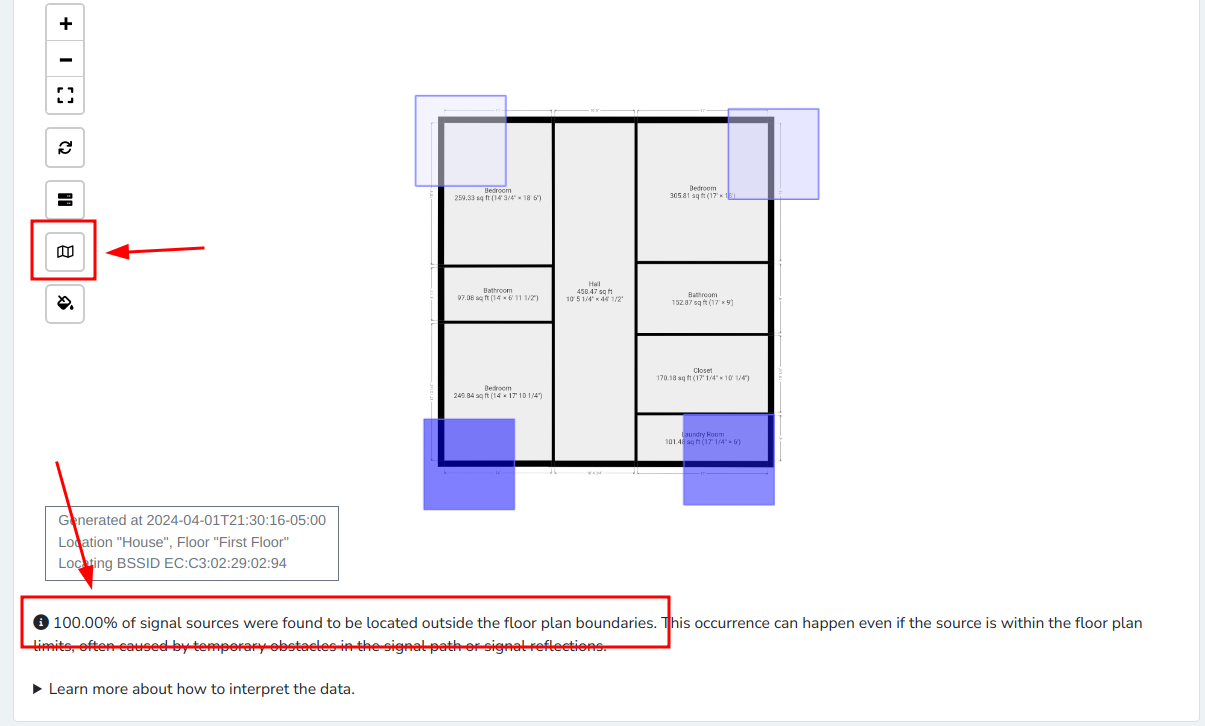
- The recorded signals have to be located within the boundaries of the uploaded floor plan. Nzyme will display how many percent of the recorded signals were located outside of the boundaries. See Locating Outside Of Floor Plan Boundaries below.
Creating Floor Plans
Creating a floor plan that can be used involves four steps:
- Creating a Tenant Location
- Creating a Floor in the Tenant Location
- Uploading a floor plan image
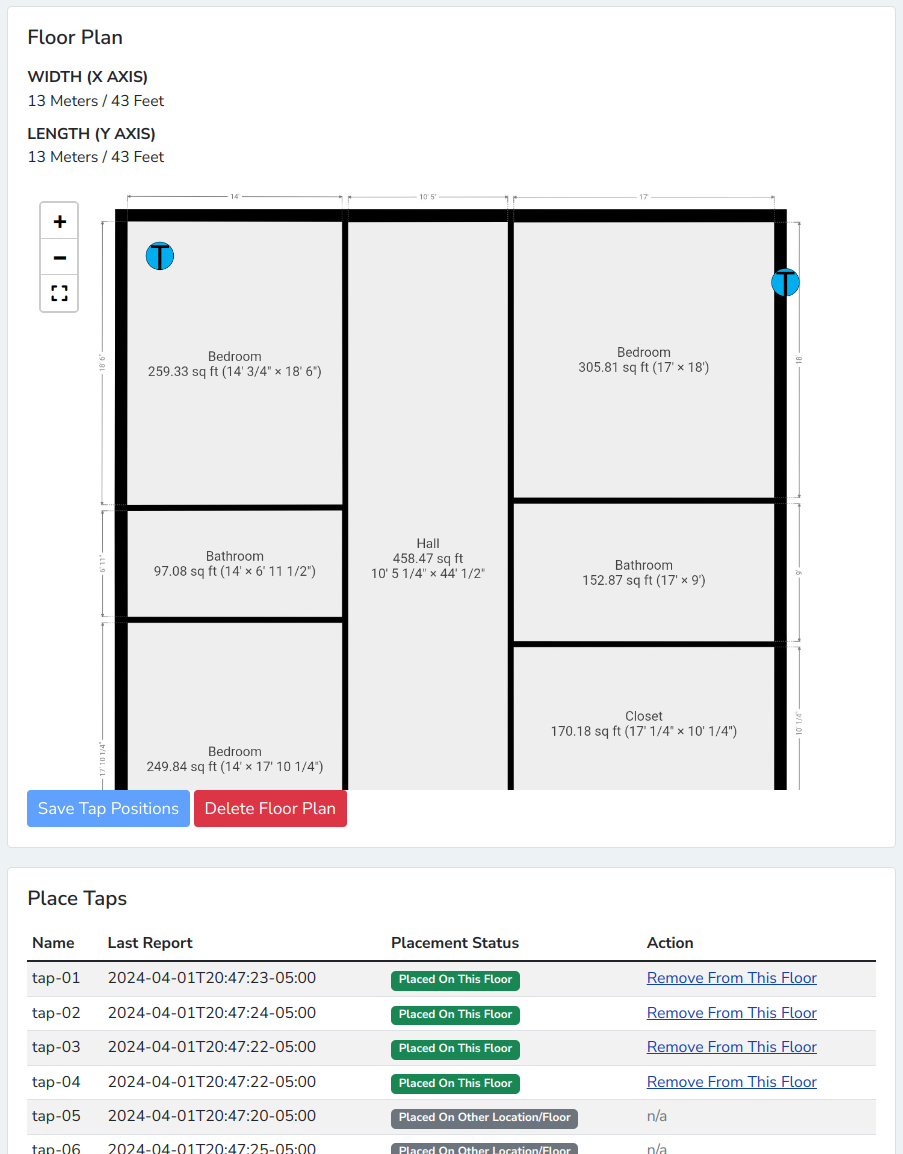
- Placing your taps on the Floor
Creating a Tenant Location
A Tenant Location is the physical location of operation of a tenant. A tenant can have multiple locations. Typical locations would be 1000 Main Street, Campus North, Building A and will usually describe a building that has one or multiple floors. If you cover outdoor areas between or around buildings, you can add those as Floors later.
Tenant Locations can be created on the tenant details page and only need a name as well as an optional description.
Creating a Floor
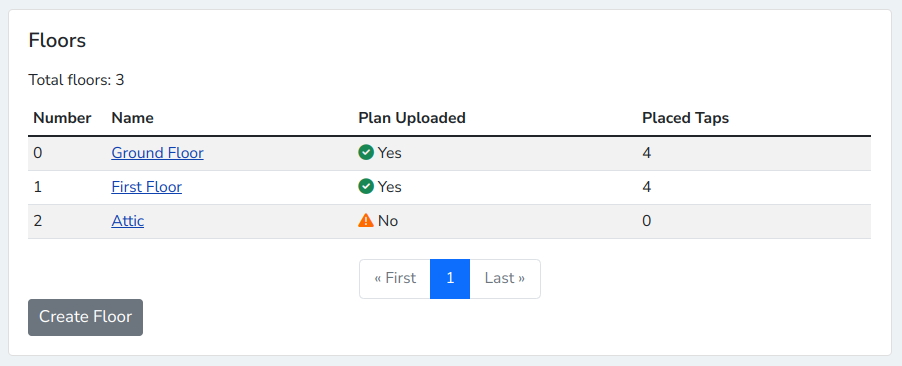
You can create a Floor of your Tenant Location (called only Location from here on out) on the location details page.
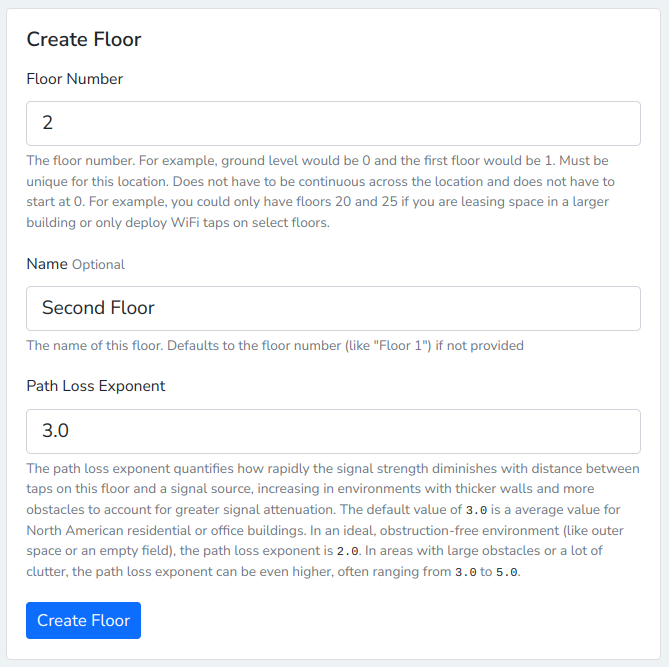
Creating a floor requires three parameters:
| Parameter | Description |
|---|---|
| Floor Number | The number of your floor. For example, the 25th floor would be "25". Must be unique for the location. |
| Floor Name | A name of the floor. Will default to "Floor [floor number]" if left empty. For example, "Floor 25". |
| Path Loss Exponent | The path loss exponent quantifies how rapidly the signal strength diminishes with distance between taps on this floor and a signal source, increasing in environments with thicker walls and more obstacles to account for greater signal attenuation. |
Uploading a Floor Plan Image
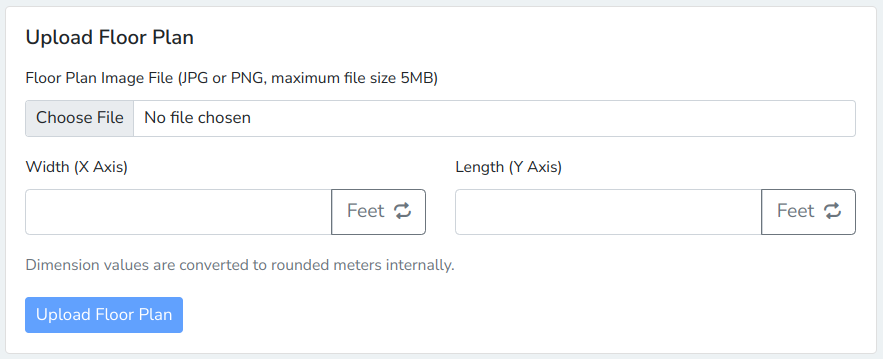
You can upload any JPG or PNG image file as floor plan on the floor details page. It will be converted to PNG internally.
The width (X axis) and length (Y axis) can be configured in feet or meters and will be converted automatically. It has to reflect the dimension of the entire floor plan image and not just the depicted floor plan itself. For example, if the floor plan image has a margin on its borders, you have to include those margins in the width and length configuration. It is best practice to remove all margins. Inaccuracy introduced here will lead to increased inaccuracy of trilateration.
Placing Taps on the Floor Plan
You can place your taps on the floor plan after you uploaded a floor plan image. Click on "Place on this floor" next to any tap that is not placed on a floor yet and drag it to its physical location on the floor plan image.
Click Save Tap Positions when you are done.
The blue tap icons can be in any of three states:
| State | Meaning |
|---|---|
| Solid Blue | Tap is placed, position is saved and tap is online. |
| Translucent Blue | Tap was added but position is not yet saved. |
| Solid Red | Tap is placed, position is saved but tap is offline. |
Using Trilateration
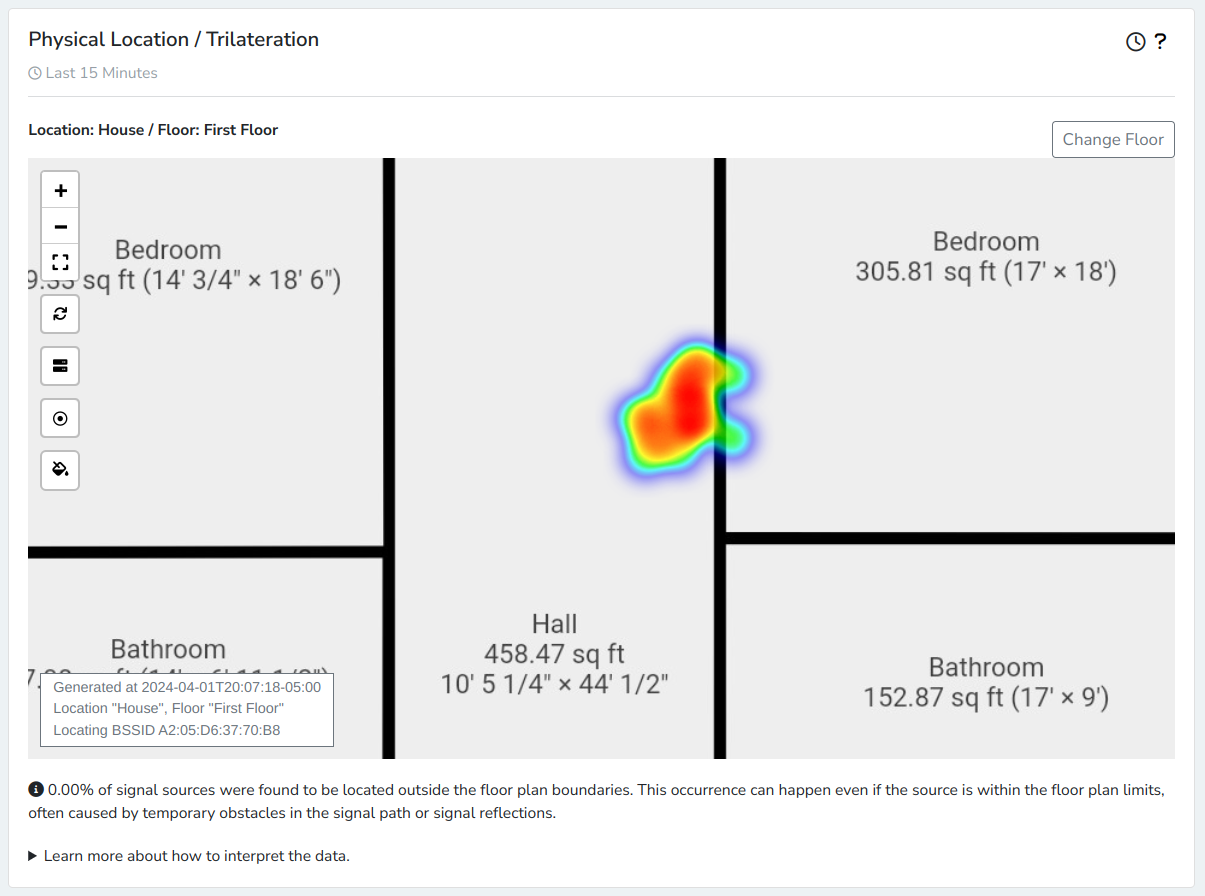
Using the nzyme trilateration features is easy once all preconditions described above are met. Nzyme will always show you the floor with the strongest cumulative signal strength first. You can manually switch to another floor. Note that signals originating on one floor can also be recorded and displayed on other floors. Compare signal strengths to make a determination of which floor the signal source is likely located on. Nzyme can only make an initial guess, and you will always know the physical constraints of the location or floor best.
Accuracy and Limitations
There are some inherent limitations to the accuracy of trilateration. The distance of a signal source is calculated based on the path loss, but the path loss is far from uniform. The signal will likely cross through obstacles like walls, furniture or even human bodies that move around and also reflect off of certain surfaces. This leads to sometimes dramatically differing estimated signal source distances. Nzyme does its best to work around this, but you should always interpret the calculated signal source location as a general indicator and include it in your wider analysis to reliably locate the physical object that is emitting the signals.
Follow the Best Practices described below to increase trilateration accuracy.
Locating Access Points
Access points (anything sending beacon or probe response frames / advertisements) can be located on the BSSID details page. Note that the trilateration feature is not available on the SSID details page, because it is SSID-agnostic.
Note that, currently, no deauthentication frames are included in the trilateration algorithm. This will be added in future releases, with disconnection analysis updates.
Locating Clients
Clients can be located using the client details page. Both probe request and data frames will be used for the location calculations.
Note that, currently, no deauthentication frames are included in the trilateration algorithm. This will be added in future releases, with disconnection analysis updates.
Locating Outside of Floor Plan Boundaries
Locating a signal source outside of floor plan boundaries is extremely unreliable. This is why nzyme does not attempt to display the location of a signal source that is too far away to be inside the floor plan boundaries.
Instead, you can click on the signal sources outside of floor plan boundaries button on the floor plan map. This will draw blue boxes around each tap on the floor, indicating the received signal strength per tap. A darker blue indicates a stronger signal strength. This will help you determine the direction the signal came from.
Best Practices
Where to Place Taps
The most critical component of trilateration reliability and accuracy is the tap placement. There are some general guidelines that you should follow as closely as possible:
- Place taps on the outside corners of your floors.
- While the minimum of taps required is three, a fourth tap is massively increasing accuracy.
- Place taps high up on the walls or even under the ceiling.
- The resolution of signal strength is not very high and trilateration in small spaces can be extremely challenging, with signal strengths being very similar in all corners of the floor. In this case, you would see almost all determined locations fall very close to the center of the floor plan.
